
IKEv2 VPN protocol is extremely secure while also providing high stability and performance speed. Therefore, it is one of the recommended VPN services for use on your device. This guide will step you through the security certificate installation and IKEv2 setup on the Windows platform.
Note: This configuration is based on Windows 10. For previous versions, the instructions may be slightly different.
Let us begin below:
1. First, you have to install the security certificate provided by Wedge Networks. Please download the WedgeARP™ - Public Key to your computer. In order to avoid any conflicts with any previous Wedge security certificates, please remove any previously installed Wedge security certificates before proceeding.
2. Save the file to your Downloads folder as shown below:

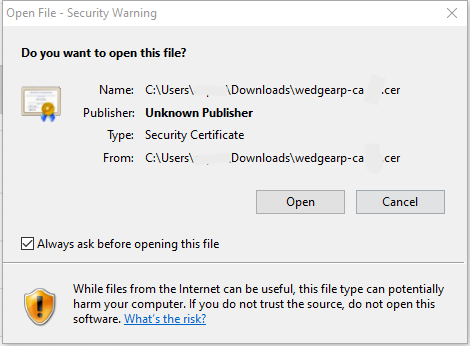
3. Once downloaded, double click on the file "wedgearp-ca.cer". Press Open once the following dialog box appears.
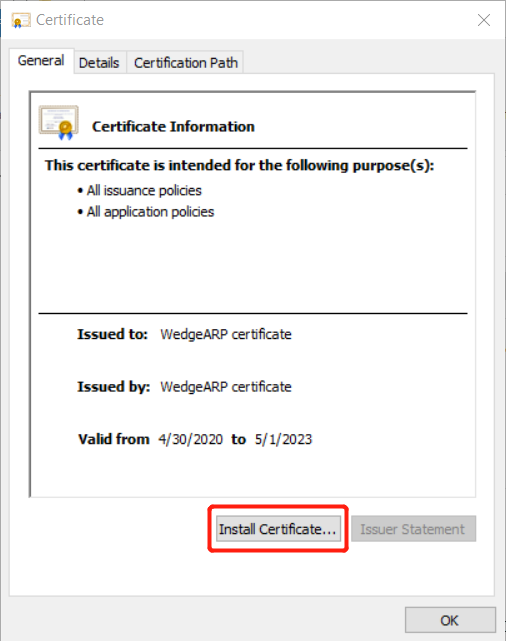
4. The Certificate dialog box will appear. Click on "Install Certificate" to install.
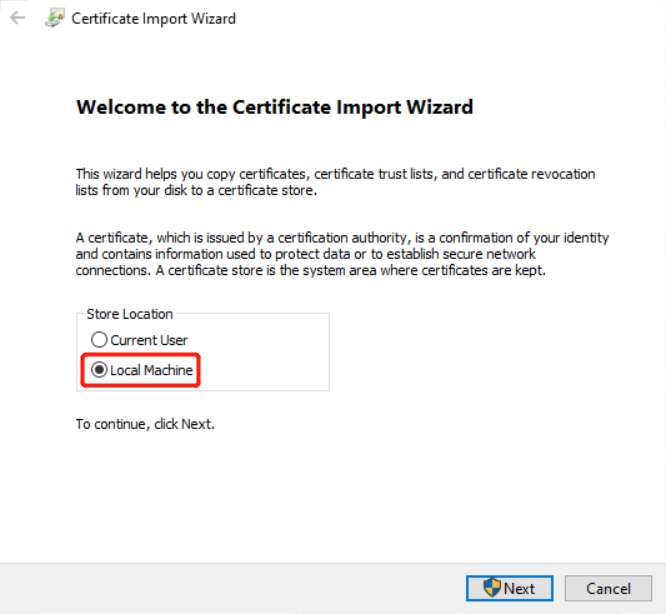
5. The "Certificate Import Wizard" dialog box will appear. Click on the radio button "Local Machine" and click Next to continue.
6. Windows will flash another screen asking for permission to make changes. Click on Yes.
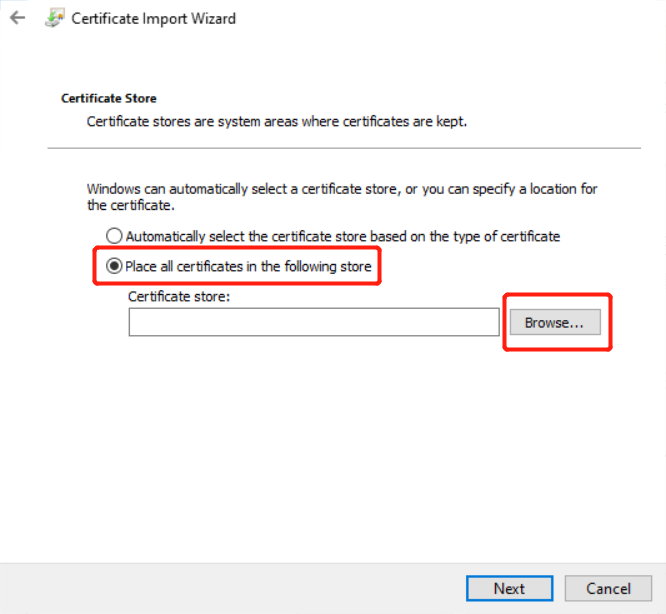
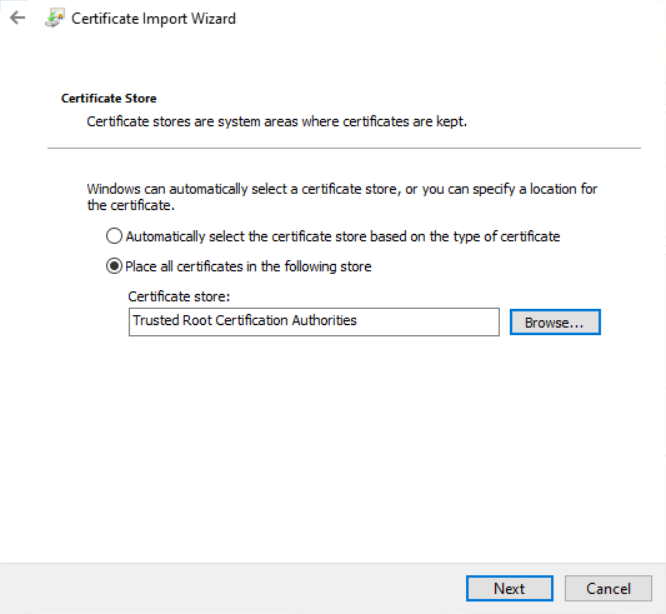
7. Choose the radio button "Place all certificates in the following store" and then click on the Browse button.
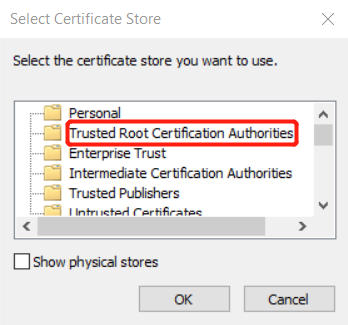
8. The following "Select Certificate Store" dialog box will appear. Click on "Trusted Root Certificate" and then OK.
9. Then, click Next as shown:
10. The following dialog box will appear. Click on Finish to complete the installation.

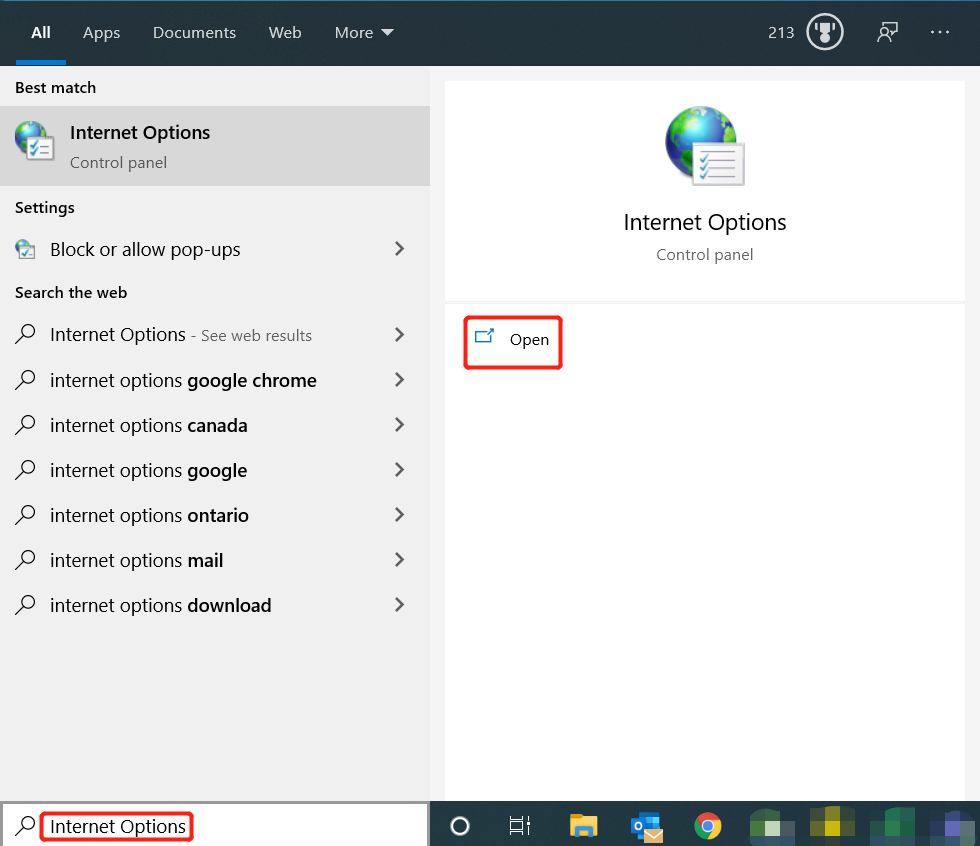
11. To verify that the certificate was properly installed, go to the Start menu and type in "Internet Options" and click on Open.
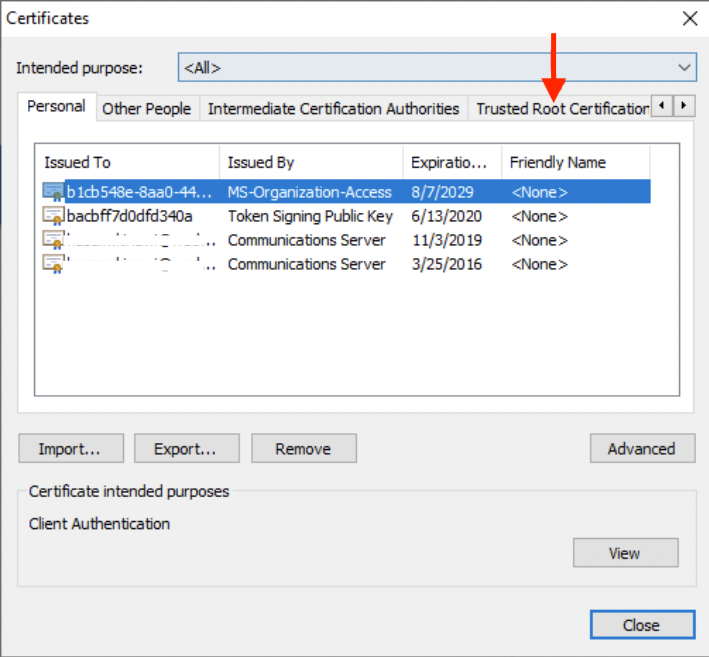
12. Once the Internet Properties dialog box comes up, navigate to the Content tab and click on Certificates to get the Certificates dialog box.

13. Click on the "Trusted Root Certification Authorities" tab.
14. Once you are on the "Trusted Root Certification Authorities" tab, scroll down the list using the right slider bar.
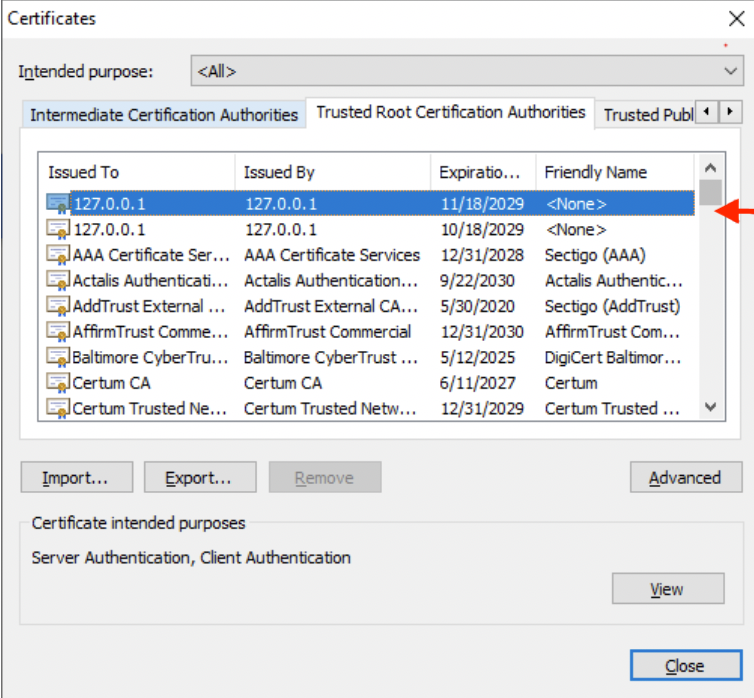
15. Scroll down until you see the WedgeARP Certificate for verification.

NOTE: For those using Mozilla Firefox browsers, you will need to install the Wedge Security certificate separately as it does not use the Microsoft Certificate key store. To install the certificate, follow the instructions on this page.
16. Now, when the certificate has been successfully installed, it is time to configure a VPN connection.
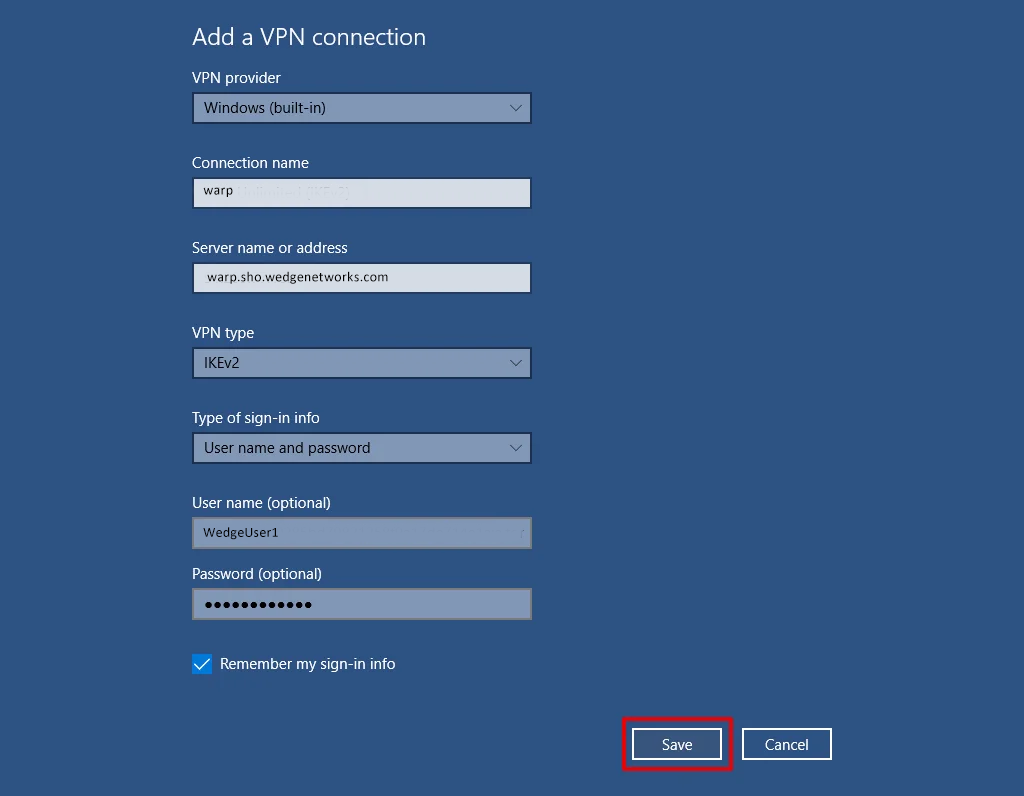
Navigate to Settings > Network & Internet > VPN and click Add a VPN connection.

17. Enter the following:
When you are finished, click on Save.
18. Next, navigate to Status on the Network & Internet Settings page and click on Change adapter options. 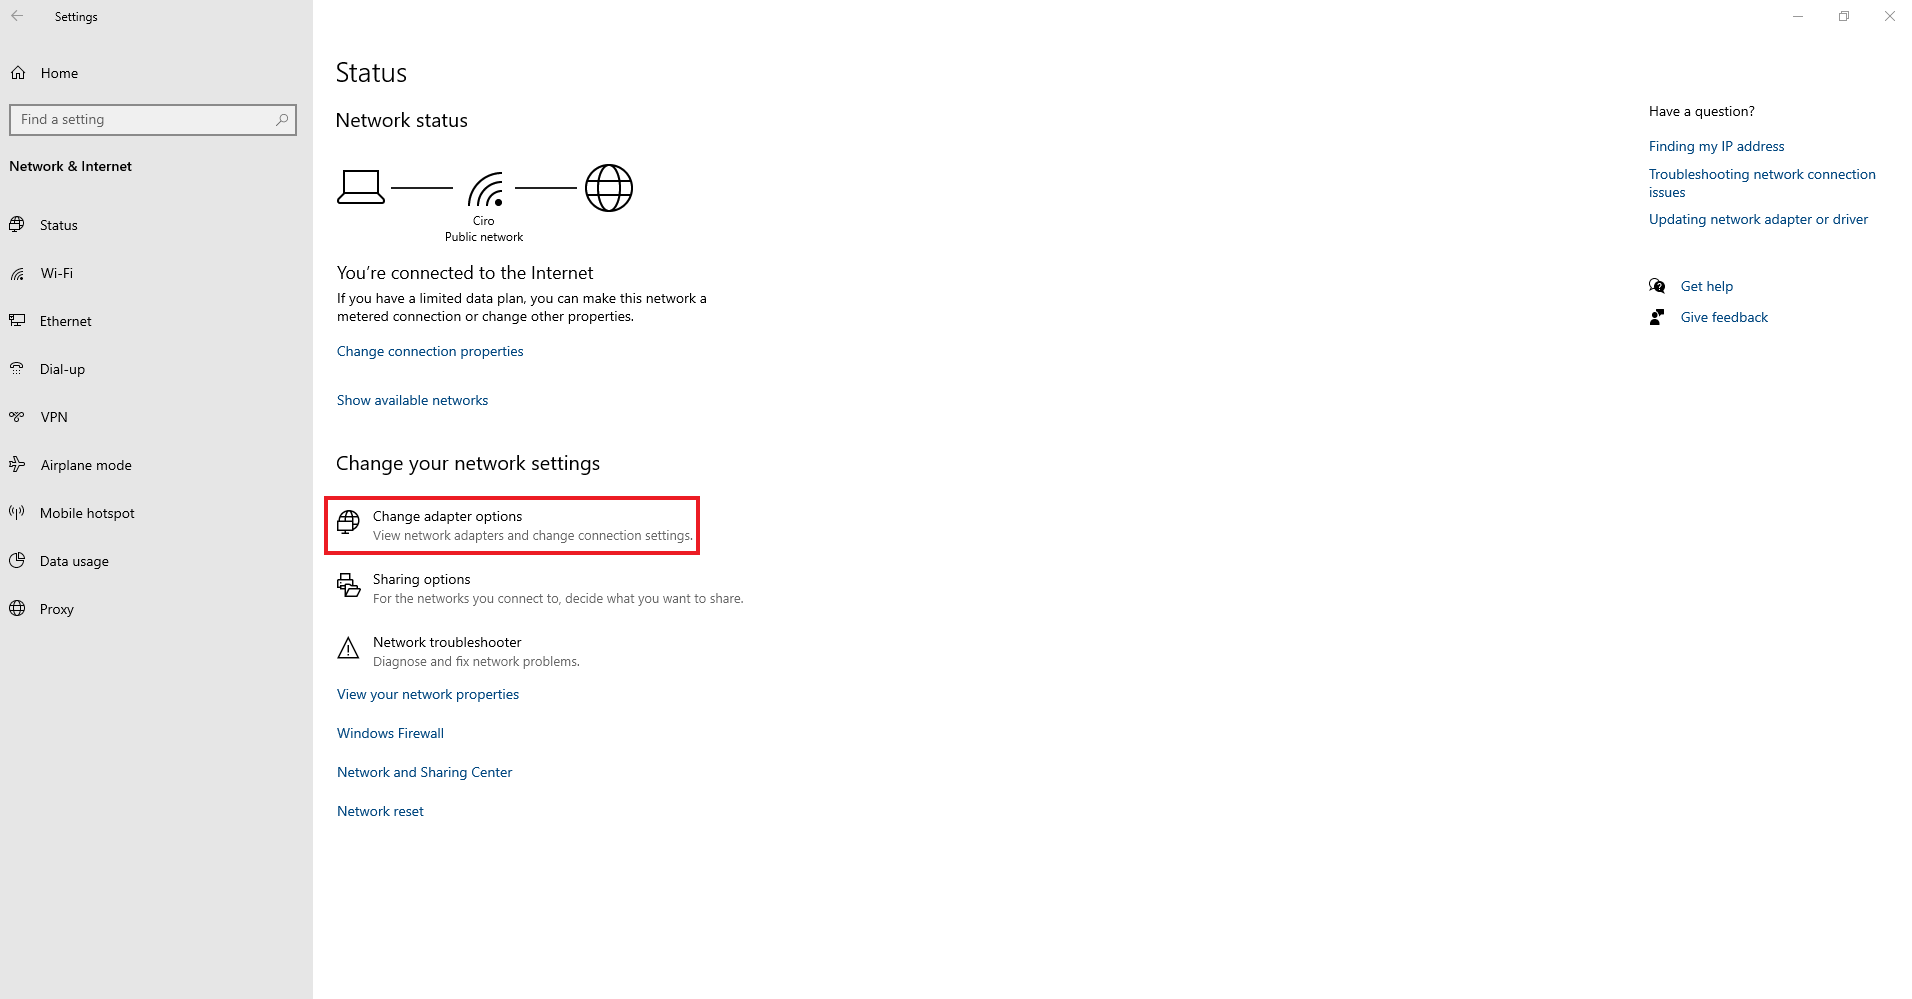
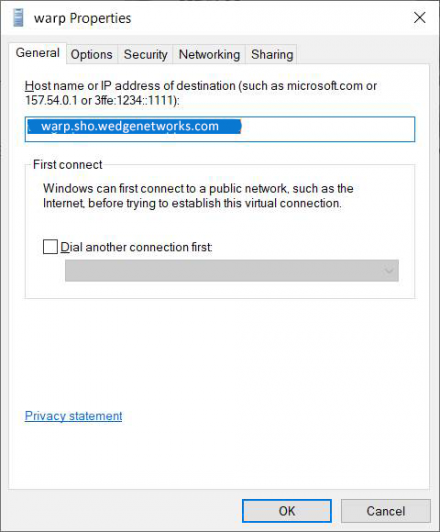
19. Right click on your VPN connection and then select Properties.

20. Ensure that your host name has been entered on the General tab.
21. Next, navigate to the Security tab. Ensure that the settings on this tab are the following:

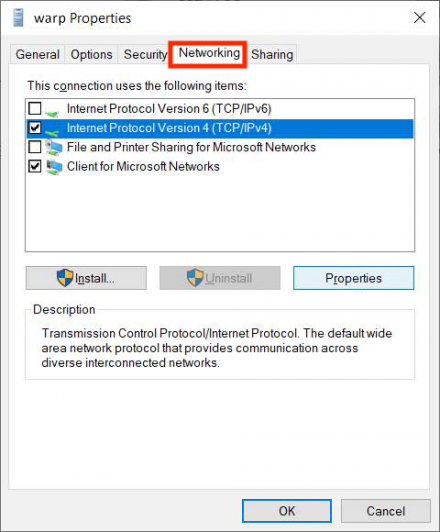
22. Then, on the Networking tab, enter the Properties section for Internet Protocol Version 4 (TCIP/IPv4).
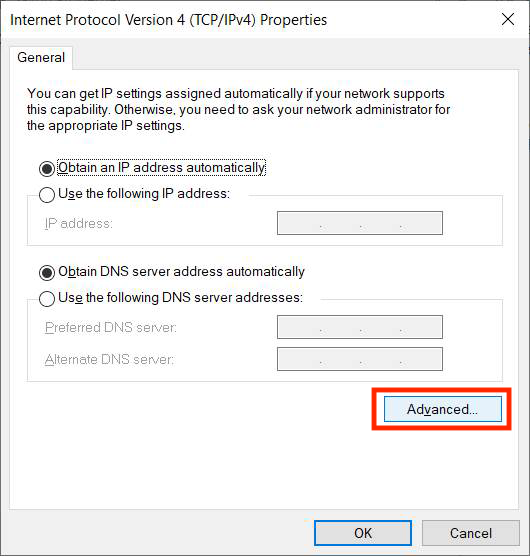
23. Ensure that the settings are as follows and then click on Advanced:
24. In the Advanced TCP/IP Settings ensure that the settings are as follows and click on OK:

25. Finally, go to your VPN settings under Network & Internet and click on Connect and the VPN connection will be established in few seconds.
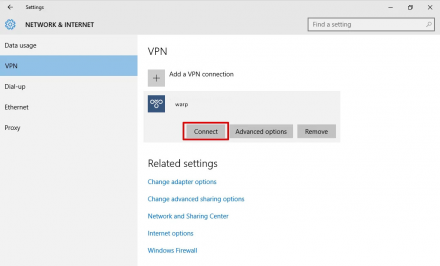
You are now running a VPN connection through the IKEv2 protocol.
Note: WedgeARP™ Secure Home Office assigns a static IP address per user tunnel. A user can only have ONE active tunnel at a time. The most recent connection will become the active tunnel for the user.
Note 2: Please note that when using WedgeARP™ Secure Home Office over some LTE operators with dual-stack (IPv4/v6) networks, users may need to reduce the MTU (Maximum Transmission Unit) size settings on their devices, otherwise they may face degraded performance. Please use the following instructions to reduce MTU size settings so as to minimize this performance degradation.
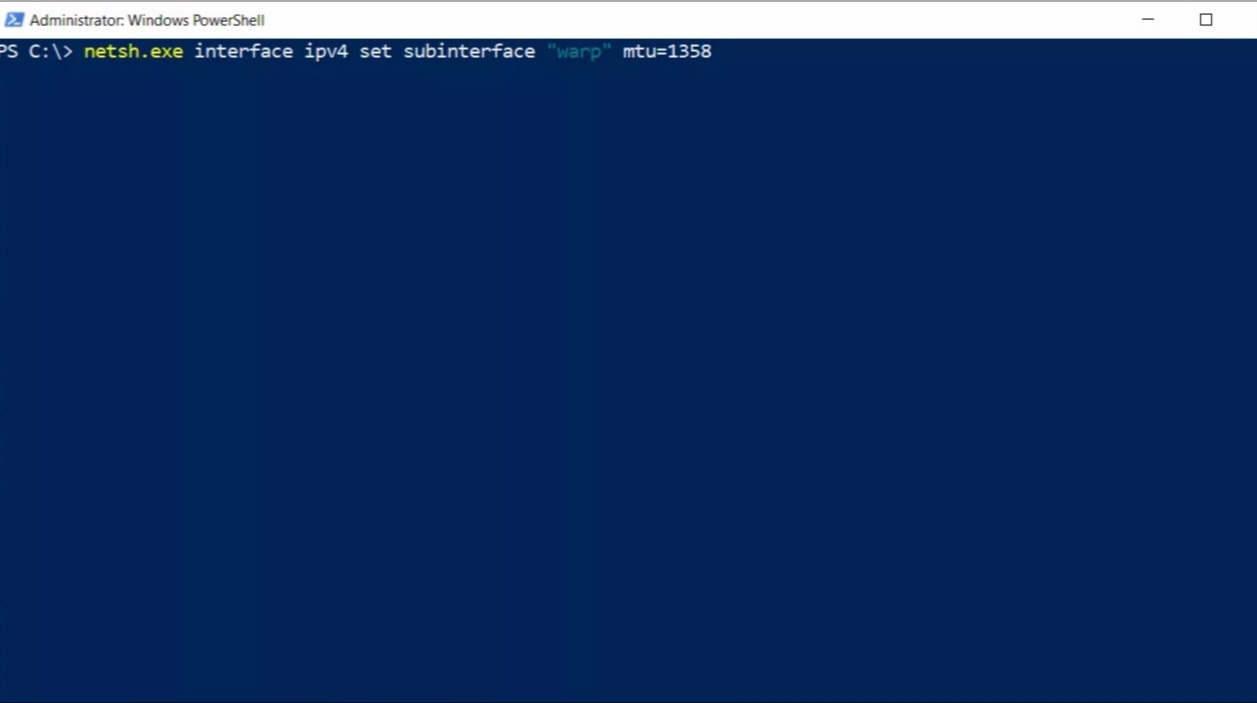
On Windows 10, MTU settings can be set by running the following in the command prompt with administrative privileges. (ignore outer quotations "" when typing in command)
"netsh.exe interface ipv4 set subinterface "warp" mtu=1358" (or any lower value than 1358).
Caution: Please note that you will need to configure your device using the generated settings by yourself and at your own risk.
For further information, please contact Wedge Sales Support Centre at: 1-888-276-5356.